The following is a sponsored post, but all opinions expressed are mine alone.
The hustle and bustle of Christmas is over. I hope you had lots of yummy treats, good food and great times spent with loved ones.
And now...
The New Year is fast approaching. Have you made your list of resolutions? I'm still working on mine, but I've got some great ideas bumbling around in my head.
2012 is looking to be great, if not a bit scary.
Student teaching.
Training for a marathon.
Moving cross-country. Yes, we'll have to change the description of this blog. :-)
With all of these things happening, there is sure to be a bit of uncertainty in how it all works out.
That's the thing with life. It's nothing if not uncertain.
One way to combat this uncertainty is to be prepared.
And one of the best ways to prepare for the future? FOOD STORAGE!
It can come in handy during times of disaster - whether natural or economic.
If preparing for the future by bulking up your food storage is on your New Year's resolution list, then you'll want to check out utah freeze dried food storage.
They have lots of options from food to water to survival gear (flashlights, etc). Their products are 100% vegetarian and Made in America.
Plus, some of their items look downright delicious!
Another thing I really appreciated on their site was a list of 7 Things You Need to Know About Food Storage. This was very informative about how food spoils and how to make food last longer.
Why not start your New Year off right with some food storage?
Looks like nearly everything is on sale. Score!
Tuesday, December 27, 2011
Tuesday, December 20, 2011
Creamy Bacon Pasta
I had some bacon to use up I think that's first! Whoever has bacon nearly go bad?, but I didn't want boring eggs and bacon for dinner tonight. Using the handy Dinner Spinner on my phone, I found this intriguing recipe. I had to make a few modifications, since I didn't have the exact ingredients.
When Jeff asked what was for dinner, I replied, "Something amazing." I'm pleased to announce that it lived up to my boastful declaration.
 |
| Creamy Bacon Pasta |
This recipe is picky husband approved.
Hmmm...perhaps I should create some kind of badge/award for that.
Anyway, onto the recipe!
Serves 2.
Ingredients:
- 4 oz pasta - I used egg noodles
- 3 slices of bacon, cut into ½-inch pieces
- ¼ cup dried, minced onion OR ½ medium onion
- ½ tsp (or 1 clove) garlic, minced
- ½ of a 10-ounce tub of cream cheese
- ¼ cup milk
- ½ cup frozen mixed vegetables
- 1 Tbsp Italian seasoning I didn't actual measure this, so this is a guesstimate
- ½ tsp crushed red pepper Again, I didn't measure, so use your best judgment
Directions:
Bring water to a boil. Cook pasta according to package directions. Drain. Rinse with hot water, if desired.
Meanwhile, cook cut up pieces of bacon in medium skillet until crisp. Remove bacon using a slotted spoon or tongs and drain on a paper towel-lined plate. Leave about a tablespoon of bacon grease in pan.

Sautee onion and garlic in bacon grease.


Cook until cheese is melted and vegetables are tender.
Serve over pasta. Top with bacon.

Like this recipe? Follow us on Facebook.
Sunday, December 18, 2011
Cream Cheese Candy Cane Cookies
I got this recipe from the Nov 2001 issue of Pillsbury Classic Cookbooks, and I've made these cookies pretty much every year since. It's a relatively quick and easy recipe - as far as cookie recipes go.

Ingredients:
- ¼ c butter, softened
- 1 (3-oz) pkg. cream cheese, softened
- 1 egg
- 1 (18.25-oz) white cake mix
- ¼ tsp red gel or paste icing color
Directions:
1. Heat oven to 350°F. In large bowl, combine butter, cream cheese and egg; blend well. Add cake mix; mix until well blended. Divide dough in half. Add food color to half of dough; blend well for even red color.
2. For each cookie, measure 1 tsp white dough and 1 tsp red dough. Roll out each into 4-inch rope. Place ropes side by side. Lightly roll together; twist. Place 2-inches apart on ungreased cookie sheet; shape each to resemble a candy cane.
3. Bake at 350°F for 7 to 9 min or just until edges are golden brown. Immediately remove from cookie sheets.

Saturday, November 12, 2011
Pie Crust
Yet another recipe I got from over at Recipe Shoebox. That's probably my first go-to blog when I'm looking for a recipe. If she doesn't have something I'm looking for, then I'll search elsewhere.
Anyway, there was a pie I wanted to try to bake and the recipe called for a pre-baked pie shell. Since my sister is usually the pie baker, I didn't have a good pie crust recipe. I meant to pick-up one of those pre-made ones at Target, but ended up leaving the register before remembering that item.
This recipe seemed as good as any, so I figured I'd give it a shot.
It turned out pretty good; I even got some compliments on it. ☺
Yields 2 to 3 9" pie crusts
Ingredients:
- 1 cup shortening
- 2 ½ cups flour
- 1 tsp salt
- 1 egg + cold water to make ½ cup liquid
Directions:
1. Cut the flour, salt, and shortening together until it is mostly the size of peas. Don't overwork the dough! It shouldn't start sticking together.
2. Make a slight well in the flour mixture. Add the egg mixture. Stir with a fork until just barely clinging together. Knead for 15-20 seconds, incorporating some of the loose crumbs. Again, don't overwork the dough! Knead until the dough is just holding together.
At this point, you could cover the dough and use it later, but it's best used right away.
3. Divide the dough onto a well floured pie mat or piece of wax paper. I used wax paper. Using your hands, pat down the dough until relatively flat. You'll want to flip it over a few times during this process of flattening, reflouring the surface slightly each time.
4. Make sure that both sides of the dough and the wax paper are well floured. Using a rolling pin, roll the crust into a somewhat circular shape. Rotate the whole mat/wax paper a few times while rolling out the dough to help get a uniform thickness.
5. After rolling out to the desired thickness, brush off any excess flour. Gently pick up the entire mat/wax paper, flip it over and center it over your pie plate. Gently release the crust onto the plate and peel off the wax paper.
If making a single crust pie...
6. Trim edge of crust, so it slightly hangs over the edge of pie plate. Roll the dough up over the rim of the plate edge and flute the pie crust. I do this by gently pressing the forefinger of my left hand on one side of the crust between the forefinger and thumb of my other hand on the other side of the crust. Repeating until I've gone around the entire pie. Prick the bottom and sides of the crust with a fork.
7. Bake at 400°F for 8-10 minutes, or until the fluted edge is a very light golden brown.
NOTE: If the crust will be filled with a cream filling that will not be baked further, instead of pricking the crust with a fork prior to baking, place a sheet of wax paper over the crust and cover the bottom with pie weights or beans to help it hold its shape. Also bake it slightly longer - until the edges are a deeper golden brown.
If making a double crust pie...
6. Place pie filling into the pie crust.
7. Roll out top crust in the same manner as the bottom crust. Gently place top crust over the top of the filled pie. Trim excess dough. Pinch the top and bottom crust edges together. Roll the pinched dough up over the rim of the plate edges and flute the pie crust. I do this by gently pressing the forefinger of my left hand on one side of the crust between the forefinger and thumb of my other hand on the other side of the crust. Repeating until I've gone around the entire pie.
8. OPTIONAL. Cut out seasonal shapes with cookie cutters from the leftover dough. Place artistically on the pie. Brush lightly with milk. Sprinkle granulated sugar over the top.
9. Poke a few holes in the top crust to allow venting for the steam to escape. Bake according to the directions for the pie filling. Watch carefully and place foil over the edges or top, if it looks like it is browning too quickly.
Wednesday, November 9, 2011
Tip: Cooking Spagetti Squash
I wasn't sure how to cook my spaghetti squash, but I found this great resource. It lists advantages and disadvantages to cutting the squash before cooking as well as simple instructions for how to cook it either cut or whole.
Like all winter squashes, spaghetti squash has a very hard shell and is difficult to cut.
I read somewhere that it is immensely easier, if you just pop the squash in the microwave for 45-60 seconds. This softens it up just a bit to make cutting it a bit easier.
With my abundance of squash this fall, I have used this trick up many times and have found it to be very helpful.
Back to the spaghetti squash...
I washed it.
Zapped it in the microwave.
Cut it in half length-wise.
Scraped out the seeds and pulp.
Put it in a microwave-safe baking dish; covered it with plastic wrap.
Microwaved it for 6-9 minutes.
Let it sit a few minutes after cooking. This allows it to both finish cooking and cool slightly to make it a bit easier on your fingers.
After the squash is fork-tender, use a fork to scrape the squash out of its shell.
It should separate nicely into strands resembling spaghetti.

Like all winter squashes, spaghetti squash has a very hard shell and is difficult to cut.
I read somewhere that it is immensely easier, if you just pop the squash in the microwave for 45-60 seconds. This softens it up just a bit to make cutting it a bit easier.
With my abundance of squash this fall, I have used this trick up many times and have found it to be very helpful.
Back to the spaghetti squash...
I washed it.
Zapped it in the microwave.
Cut it in half length-wise.
Scraped out the seeds and pulp.
Put it in a microwave-safe baking dish; covered it with plastic wrap.
Microwaved it for 6-9 minutes.
|
Removing the strands from a cooked spaghetti squash |
Let it sit a few minutes after cooking. This allows it to both finish cooking and cool slightly to make it a bit easier on your fingers.
After the squash is fork-tender, use a fork to scrape the squash out of its shell.
It should separate nicely into strands resembling spaghetti.
Sunday, November 6, 2011
Halloween Cheesecakes
I know that Halloween was nearly a week ago, but, for the past few years, my parents have hosted a Halloween party the Sunday after the holiday. I was asked to make a dessert this year. I wanted to find something I could make that would use some of the squash in my fridge, so when I found this recipe over on Recipe Shoebox, I knew it would be perfect! I can't get over how great these turned out.
 |
| Flying Witch |
Yields 2+ cheesecakes
Ingredients:
- 2 ready made graham cracker crust
- 4 8 oz packages of cream cheese, softened
- ¾ c granulated sugar
- ¼ c packed brown sugar
- 2 tsp vanilla
- 1 small golden nugget squash
- 4 eggs
- ½ tsp pumpkin pie spice (or ¼ tsp cinnamon, ⅛ tsp nutmeg, ½ of ⅛ tsp each of allspice and cardamom)
- 1/2 c semi sweet chocolate chips, melted
- Pictures of a flying witch or a howling wolf or whatever you'd like on the cheesecake
Directions:
1. Pierce squash a few times with a fork. Soften in microwave for 45-60 secs. Cut in half; remove seeds. Place in a microwaveable dish; cover with plastic wrap. Cook for 9 minutes or until fork tender. Scoop squash into a food processor and blend until smooth. This should give you about 1 cup of purée.
2. While squash is cooking, cream the cream cheese and sugars together in a bowl until smooth and creamy. Add vanilla and eggs . Mix until well blended. Reserve 1 cup of batter. Pour remaining evenly between two graham cracker crusts.
3. Add squash purée and pumpkin pie spice to the reserved batter. Mix well. Drop by spoonfuls onto the white batter. Gently swirl with a knife. I swirled in one direction to give the impression of a windy, stormy, scary, Halloween night. I had a LOT of leftover squash batter, so I put it in a small dish to bake a 3rd, smaller, no-crust cheesecake.
4. Bake at 350°F for 40-45 min or until the center is still barely jiggly or right before cracks start to appear. Remove and let cool on cooling rack.
5. While cheesecakes are baking, place pictures under wax paper. Put melted chocolate into a plastic baggie and snip off the corner. Pipe the chocolate over the pictures. I had some extra chocolate, so I hand drew a full moon, a spider web, a spider, and some bats/birds/whatever. Place on a cookie sheet and put in the freezer to harden.
6. Once cheesecakes have cooled, cut the wax paper around the chocolate pictures and place pictures on the cheesecake, wax paper side up. Leave waxed paper on and chill cakes in the fridge for 8+ hours or overnight. Gently pull off waxed paper.
 |
| Wolf Howling at Full Moon |
 |
| Spider and Web |
Monday, October 31, 2011
Loaded Potato Soup
I'm kind of a sucker for potato soups. I don't know what it is about them, but there's hardly been one I didn't like. This recipe was no exception. Originally found on MyRecipes.com, I, of course, made some very minor alterations.
Serves 4.
Ingredients:
- 4 (6-ounce) red potatoes
- 2 tsp olive oil
- ½ cup chopped celery
- ¼ cup dried, minced onions
- 1 heaping tsp Organic Better Than Bouillon™ chicken base
- 1¼ cups water
- 3 T all-purpose flour
- 2 cups skim milk, divided
- ¼ cup sour cream
- ¾ tsp salt
- ¼ tsp pepper
- 4 bacon slices
- ⅓ cup shredded monterey jack cheese
Directions:
1. Wash potatoes. Pierce with a fork and microwave on HIGH for 12 minutes or until fork tender. Cut in half; cool slightly.
2. Meanwhile, heat oil in a saucepan over medium-high heat. Add celery and onion; sauté 2-3 minutes. Add chicken base and water. Stir until base dissolves.
3. Combine flour and ½ cup milk; add to pan with remaining 1½ cups milk. Bring to a boil, stirring frequently. Cook 1 minute. Remove from heat; stir in sour cream, salt, and pepper.
4. Arrange bacon on a paper-towel lined microwave safe plate. Cover with a paper towel and microwave on HIGH for 4 minutes. Crumble bacon.
5. Scoop insides of potatoes into pan; discard skins. Coarsely mash potatoes into soup. Top with cheese and bacon.

NOTE: My husband really likes salt, so I tend to make everything a little on the salty side. This could easily have the salt reduced to ½ tsp (per the original recipe), if you might like a little less salt. I thought it was perfect, but Jeff still added a bunch of salt to his bowl!
Sunday, October 23, 2011
Pattypan Squash with Pasta and Red Sauce
Here's another squash recipe that I just threw together one evening for dinner. It's very simple, and was very tasty, but I did no measuring. Sorry. I did; however, take a couple process pictures.
Ingredients:
- Pasta (I used whole wheat penne)
- Pattypan squash, cut into bite-sized chunks (I used Yellow Sunburst)
- Dried, minced onion
- Dried, minced garlic
- Red pasta sauce
- Salt
- Pepper
- Dried basil
- Grated parmesan cheese
Directions:
1. Bring water to a boil in a saucepan. Cook pasta according to package instructions.
2. Sautee squash with onion and garlic in a small skillet.

3. When squash is tender, add pasta sauce, salt, pepper, and basil. Simmer for 5-10 minutes.

4. Pour sauce over drained pasta. Sprinkle with parmesan cheese.

This was a tasty dinner for one that I would definitely make again.
Potato Salad
My sister (not the co-auther of this blog, another sister) is generally the potato salad maker, but I had a lot of potatoes to use up, so I figured a potato salad would be perfect. I searched online and found this recipe, which I have modified into a tasty version of my own. Jeff, who normally doesn't care much for potato salad, surprised me by not only liking this concoction but also having multiple servings. Now that's what I call success!


Yields 6 servings.
Ingredients:
- 1 ½ pounds potatoes, peeled
- 2 eggs
- ½ cup mayonnaise
- ¼ cup salad dressing (e.g. Miracle Whip®)
- 1 Tbsp dijon mustard
- 1 Tbsp milk
- 1 Tbsp distilled white vinegar
- 1 Tbsp dried, minced onion
- 1 tsp Mrs. Dash Garlic & Herb
- ¼ tsp salt
- ⅛ teaspoon ground black pepper
- ½ cup sliced celery
- Paprika, to taste
Directions:
1. Place potatoes into a large pot of salted water; bring to a boil. Cook until fork tender, about 15 minutes. Drain, cool and chop into 1 inch cubes. Place in a medium bowl.
2. Place eggs in a medium saucepan and cover with cold water. Bring water to a boil and immediately remove from heat. Cover and let eggs stand in hot water for 12 to 14 minutes. Drain water and immediately add cold water and/or ice. Peel and dice.
3. In a small bowl, whisk together mayonnaise, salad dressing, dijon mustard, milk, vinegar, onions, Mrs. Dash, salt and pepper. Pour the mixture over the potatoes, and mix together with the eggs and celery. Cover and chill in the refrigerator at least 2 hours before serving.
 |
Wednesday, October 19, 2011
Squash Stuffed with Chard and Black Beans
This is one of the first squash recipes I tried. I found the recipe here originally, I but made a few changes to make it my own. I was surprised at how tasty this was! Unfortunately, Jeff didn't care for it too much and really only enjoyed the topping.
Serves 2
Ingredients:
- 1 med acorn squash, halved, seeded
- ½ tsp plus 1 T extra-virgin olive oil, divided
- ¼ tsp salt, divided
- ¼ tsp freshly ground pepper, divided
- ¼ cup onion, chopped
- 1 clove garlic, minced
- 1 T water
- ½ T tomato paste
- 4 cups chopped chard leaves (about ½ large bunch chard)
- ½ (15-oz) can black beans, drained, rinsed
- 2 T coarse dry Italian breadcrumbs
- 2 T grated Parmesan cheese
Directions:
1. Cut a small slice off the bottom of each squash half so it rests flat. Brush the insides with ½ tsp oil; sprinkle with ⅛ tsp each salt and pepper. Place in a microwave-safe dish. Cover with plastic wrap and microwave on High until the squash is fork-tender, about 12 minutes.
2. Meanwhile, heat ½ T oil in a large skillet over medium heat. Add onion; cook, stirring, until starting to brown, 2 to 3 minutes. Add garlic; cook, stirring, for 1 minute. Stir in water, tomato paste and the remaining ⅛ tsp each salt and pepper. Stir in chard, cover and cook until tender, 3 to 5 minutes. Stir in black beans; cook until heated through, 1 to 2 minutes more. Remove from the heat.
3. Preheat broiler.
4. Combine breadcrumbs, Parmesan and the remaining ½ T oil in a bowl. Fill each squash half with about 1 cup of the chard mixture. Place in a baking pan or on a baking sheet. Sprinkle with the breadcrumb mixture. Broil in the center of the oven until the breadcrumbs are browned, 1 to 2 minutes.

Monday, October 17, 2011
Braided Bread with a Touch of Rye
I found this recipe on my friend's blog, Recipe Shoebox. It looked so good! I was the first to leave a comment, and I couldn't wait to try it out myself. Well, it took me over a month to finally give it a shot (and now another 4 months to blog about it), and it turned out better than I could have expected. I brought it to my family's Sunday dinner, and everyone loved it. We still tease my nephew about eating nearly an entire loaf by himself. It was that good!
Yields 2 loaves.
Ingredients:
- 2 Tbs. yeast
- 1-1/4 cups warm water (110-115 degrees)
- 1/4 cup soft butter (not melted)
- 1 tsp. salt
- 1 pkg. (2.9-oz.) vanilla pudding mix NOTE: Don't use sugar free varieties of vanilla pudding mixes. (I did use an instant mix though, and it worked just fine.)
- 3-4 cups flour (I used mostly all purpose flour mixed with some rye. This was a few months ago, but I think I used closer to a 3:1 ratio for the white to rye flours)
Directions:
1. In a large bowl, dissolve yeast in warm water. Add softened butter, salt, and dry pudding mix. Stir until dissolved. Gradually add flour to right consistency.
2. Knead dough 12 times (or 2 minutes in mixer). Divide dough into 6 equal portions and roll out into a long shape. Braid 3 together for a loaf. Place on greased cookie sheet. Let rise 2 hours (or until doubled).
3. Bake at 350°F for 20-25 minutes or until light golden brown.
2. Knead dough 12 times (or 2 minutes in mixer). Divide dough into 6 equal portions and roll out into a long shape. Braid 3 together for a loaf. Place on greased cookie sheet. Let rise 2 hours (or until doubled).
3. Bake at 350°F for 20-25 minutes or until light golden brown.
 |
| Braided Rye Bread |
Enjoy!
Sunday, October 16, 2011
Peppery Squash Soup
I made this squash soup a couple weeks ago. I thought it was delicious and subsequently, it was my lunch throughout the week. Maybe even longer. While I did scour the Internet for some soup recipes, I ultimately came up with this recipe on my own - pulling from a few different recipes (sources for which I can no longer remember) I had found online. I mostly threw in a little of this and a little of that, so the measurements listed below are largely guesses but should suffice as a starting off point.
Ingredients:
Directions
1. Cut squash in half. Brush with 1T oil; season with salt and pepper. Cook until fork tender (roast, boil, microwave, whatevs). I'm lazy and impatient, so I chose the microwave method. Mash cooked squash with a fork.
2. In large pot, heat oil. Sautee garlic and onion. Add cream cheese. Cook and stir until cheese is completely melted. Add cooked squash to the big pot. Add the bouillon and water. Season with Mrs. Dash and cayenne pepper. Simmer for at least 20 minutes.
3. Blend soup in a blender, using an immersion blender, or in a food processor. I don't have any of those, but I do have a Magic Bullet. I used all 6 blender cups to get all the soup blended. Return to pot and simmer until hot again (or longer to let the flavors continue to meld).
 |
| Peppery Squash Soup |
- 1 med Delicata squash
- 1 med Acorn squash
- 2 T Olive oil, separated
- Salt and Pepper, to taste
- 2 cloves garlic, minced
- 1 sm onion, chopped
- 4 oz cream cheese - this is the only ingredient I actually measured
- 4 tsp bouillon - I used a vegetable based, but chicken based would probably also be good
- 4 cups water
- 1 T Mrs. Dash Garlic & Herb
- 1 tsp cayenne pepper
Directions
1. Cut squash in half. Brush with 1T oil; season with salt and pepper. Cook until fork tender (roast, boil, microwave, whatevs). I'm lazy and impatient, so I chose the microwave method. Mash cooked squash with a fork.
2. In large pot, heat oil. Sautee garlic and onion. Add cream cheese. Cook and stir until cheese is completely melted. Add cooked squash to the big pot. Add the bouillon and water. Season with Mrs. Dash and cayenne pepper. Simmer for at least 20 minutes.
3. Blend soup in a blender, using an immersion blender, or in a food processor. I don't have any of those, but I do have a Magic Bullet. I used all 6 blender cups to get all the soup blended. Return to pot and simmer until hot again (or longer to let the flavors continue to meld).
 |
| Peppery Squash Soup with Cheez-Its® |
Especially delicious served with Cheez-It® or Goldfish® brand crackers.
Saturday, October 15, 2011
Golden Nugget Muffins
It's a beautiful fall morning this morning. Only in the 40s when I took Sallie out for her morning walk. Brr... (although I still wore flip flops). I thought, "This would be a perfect morning for cocoa and muffins for breakfast." As you might remember, I have an abundance of squash, so I set about finding a muffin recipe using squash.
I found something that would work on allrecipes.com. I made a few changes, and these turned out so tasty!
Ingredients:
I found something that would work on allrecipes.com. I made a few changes, and these turned out so tasty!
Ingredients:
- 1 small golden nugget squash
- 1 cup all-purpose flour
- ½ cup whole wheat flour
- 2 tsp baking powder
- ½ cup white sugar
- ¼ tsp salt
- 1 tsp cinnamon
- ½ tsp nutmeg
- ¼ tsp allspice
- ¼ tsp cardamom
- (Cinnamon, nutmeg, allspice, and cardamom could be replaced with 2 tsp pumpkin pie spice)
- ¾ cup milk
- 1 egg, beaten
- 1 T butter, melted
Directions:
1. Wash squash. Prick with a fork and microwave for 60 secs. Remove from microwave, cut in half crosswise, and remove seeds. Place both halves in a microwave safe dish, cover with plastic wrap, and microwave for 6 minutes or until fork tender. Puree squash in a food processor. This should yield probably around 1 cup of squash puree, though I didn't actually measure it.
2. Preheat oven to 400°F. Line muffin tin with cupcake liner or spray with cooking spray.
3. While squash is cooking, whisk together dry ingredients (flours, baking powder, sugar, salt, spices).
4. In a heavy duty mixer (KitchenAid®), stir the milk, egg, and butter. Stir in the pureed squash. Gradually stir in the flour mixture until just moistened.
5. Spoon into prepared muffin tin, filling cups about ½ full. Bake 20 minutes in the preheated oven, or until a toothpick inserted in the center of a muffin comes out clean. Remove from muffin tin and cool on a wire rack.
 |
Enjoy with a cup of hot cocoa for a pleasant start to a cool fall day.
Sunday, October 2, 2011
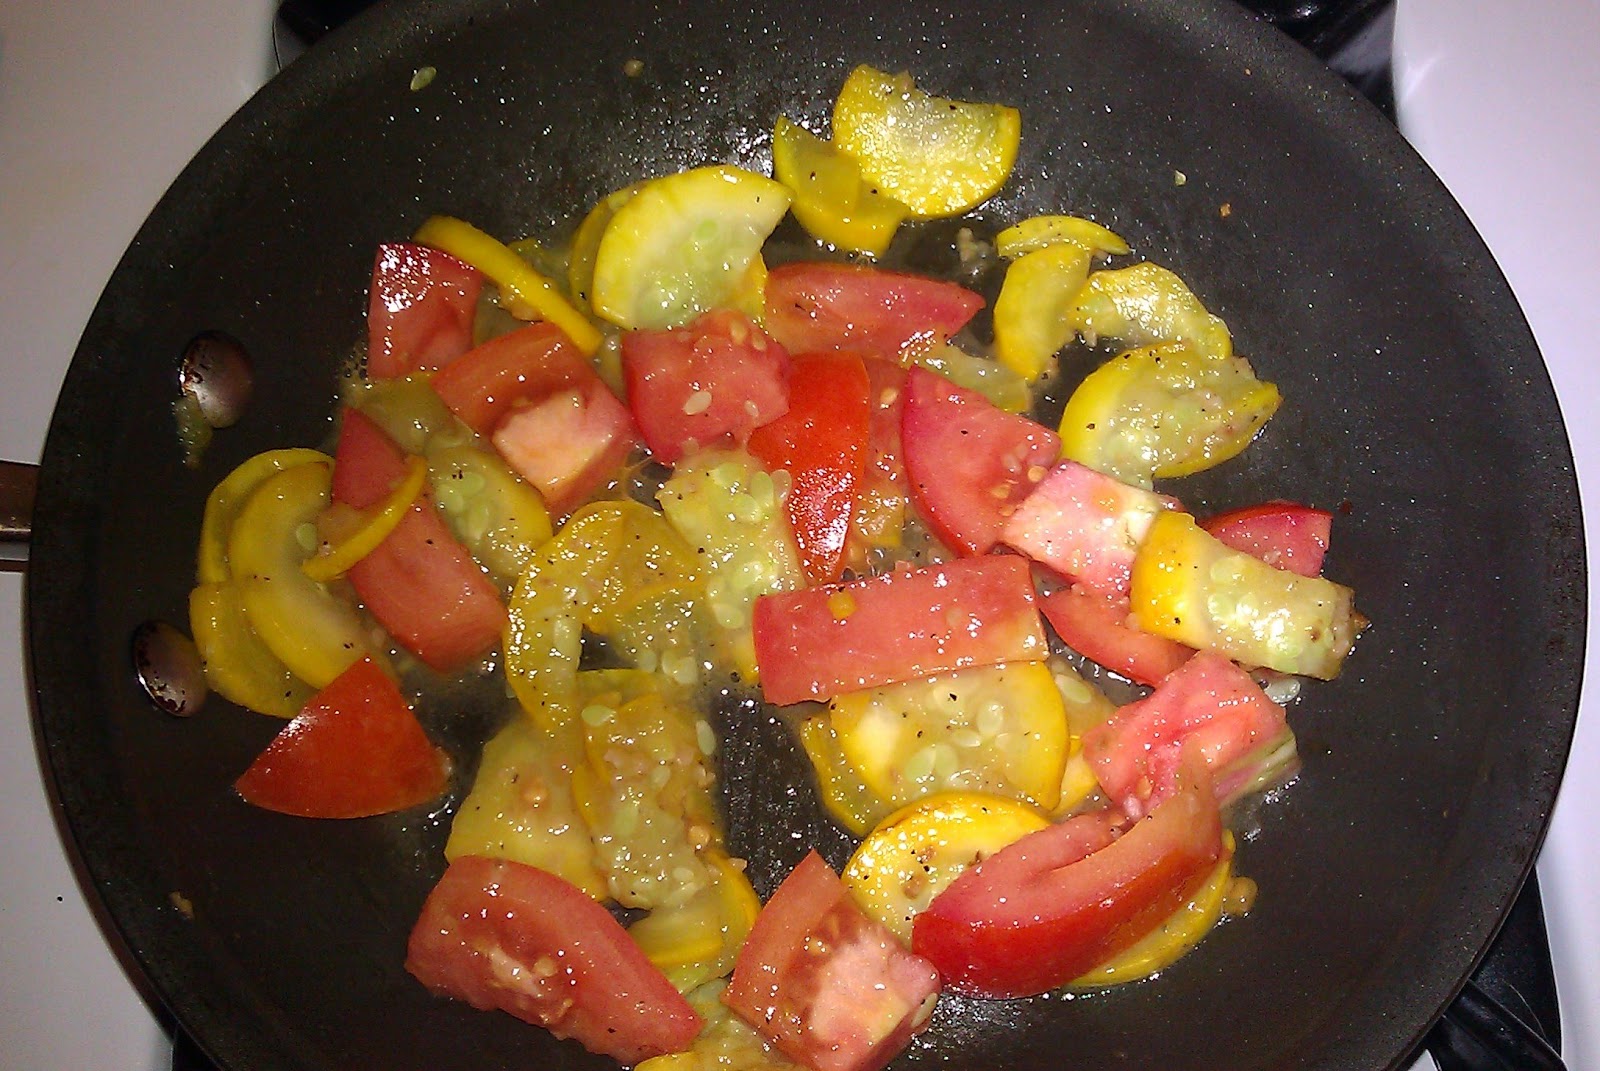
Gnocchi with Squash and Tomatoes
We've received a lot of different types of squash in our CSA, so look forward to some yummy squash recipes coming your way. Last night, I had some yellow squash to use up, so I threw together this quick and easy recipe.
Serves 1
Ingredients:
- Tri-colored gnocchi
- 1 T olive oil
- 1/2 medium yellow squash, sliced
- 1/2 tsp minced garlic
- salt/pepper to taste
- 1 medium tomato, coarsely chopped
- 1/4 cup red pasta sauce
- grated parmesan cheese
Directions:
1. Prepare gnocchi according to package directions
2. Heat oil in small skillet; sautee squash with garlic and salt/pepper.

3. Add tomatoes.
4. Add pasta sauce.
5. Pour sauce mixture over gnocchi, sprinkle with parmesan cheese. Enjoy with a nice glass of Riesling.

Thursday, September 15, 2011
Crockpot Potato Soup
I love, love, love potato soup! I always have. I remember making it once as a teenager; it was delicious. This, unfortunately, is not that recipe. I found this recipe at Recipe Shoebox. I made a few minor changes and modified it to a slow cooker.
Click here for nutritional facts.
Click here for printable version.
- 4 large potatoes
- 5 1/2 cups water
- 6 chicken bouillon cubes
- 1/4 c dried, minced onions
- 9 baby carrots, chopped
- 3 celery stalks, chopped
- 1 T parsley
- 1 T coarse Kosher salt
- 1 1/2 tsp minced garlic
- 1 1/2 cups milk
- 1/3 cup butter, softened
- 2/3 cup whole wheat flour
Directions:
Peel and prep potatoes. I've made this soup with diced potatoes. Jeff has complained about the potato chunks being too big, so this time, I prepped the potatoes julienne-style using my Pro Chopper Plus that I got for my birthday last year. I love this little kitchen gadget!

Anyway, combine all but the last three ingredients in a slow cooker. Cook on low for 4-6 hours or until veggies are tender.
Stir in milk.
Prepare a roux with the butter and flour. Add a bit of the hot liquid from the soup. Stir until thick and smooth.
Add roux mixture to the crockpot, while stirring briskly.
Cook for an additional 30 - 45 minutes.
I just found this in my drafts. Seems all ready to go except for a picture of the actual soup. So my apologies, but I'll just post this now and maybe next time I make it, I'll update this post.
I just found this in my drafts. Seems all ready to go except for a picture of the actual soup. So my apologies, but I'll just post this now and maybe next time I make it, I'll update this post.
Monday, August 29, 2011
Cream of Broccoli soup
This is not going to be some fantastic, gotta try recipe.
I'm trying to be very conservative in my lunches (read: living like a poor college student), so I bought some condensed soups for those days when I have no leftovers from the night before and no time in the morning to pack anything else for lunch.
So, today, I threw a can of Cream of Broccoli soup into my purse as I rushed out the door to catch my bus.
Around 12:30, I was starving.
I grabbed that can of soup -- super excited for my delicious lunch -- only to read the label that clearly states MIX WITH 1 CAN OF MILK.
Milk?? Drats.
No milk here at work.
No credit card.
No cash.
Meant no run to the convenience store for a little jug of milk.
By now, I was super starving.
Guess I'll just make it with water and hope it's not too disgusting.
And then *epiphany* I'll just add some powdered coffee creamer to it to make it all creamy.
 Is it the best tasting soup ever? Definitely not.
Points for creativity? You tell me.
At least I'm no longer starving.
At least there was some plain creamer in the cupboards and not Hazelnut flavored.
I'm trying to be very conservative in my lunches (read: living like a poor college student), so I bought some condensed soups for those days when I have no leftovers from the night before and no time in the morning to pack anything else for lunch.
So, today, I threw a can of Cream of Broccoli soup into my purse as I rushed out the door to catch my bus.
Around 12:30, I was starving.
I grabbed that can of soup -- super excited for my delicious lunch -- only to read the label that clearly states MIX WITH 1 CAN OF MILK.
Milk?? Drats.
No milk here at work.
No credit card.
No cash.
Meant no run to the convenience store for a little jug of milk.
By now, I was super starving.
Guess I'll just make it with water and hope it's not too disgusting.
And then *epiphany* I'll just add some powdered coffee creamer to it to make it all creamy.
Points for creativity? You tell me.
At least I'm no longer starving.
At least there was some plain creamer in the cupboards and not Hazelnut flavored.
Sunday, June 26, 2011
Peanut Butter Oatmeal Chocolate Chip Cookies
This past Thursday was a rather cool summer evening, so I decided to bake some cookies. I found a recipe for peanut butter cookies and decided to make it my own by adding a little oatmeal and chocolate chips, because honestly, don't those two ingredients make all cookies a little better? Okay, maybe not, but it certainly didn't hurt this recipe.
I brought a couple dozen into work the next day, and everyone said how good they were. When I got home from work, Jeff couldn't help but rave a bit about these delicious cookies!
Ingredients
I brought a couple dozen into work the next day, and everyone said how good they were. When I got home from work, Jeff couldn't help but rave a bit about these delicious cookies!
This recipe is modified from a recipe found in my KitchenAid mixer recipe book.
 |
| Peanut Butter Oatmeal Chocolate Chip Cookies |
Directions
- ¾ cup creamy peanut butter
- ½ cup shortening
- 1 ¼ cup light brown sugar, firmly packed
- 3 T milk
- 1 T vanilla
- 1 egg
- 1 ¾ cups all-purpose flour
- ¾ tsp salt
- ¾ tsp baking soda
- 1 cup oatmeal
- 1 cup semi-sweet chocolate chips
Preheat oven to 375°F.
Cream together peanut butter, shortening, brown sugar, milk, and vanilla until well blended. Add egg, mixing until well blended.
Combine flour, salt, and soda in a separate bowl. Gradually add dry ingredients to peanut butter mixture. Stir in oatmeal and chocolate chips.
Drop by teaspoonfuls onto ungreased cookie sheets. Flatten slightly with a fork in a crisscross pattern.
Bake for 7-8 minutes or until set and lightly browned.Yields 3 dozen cookies.
 |
| Peanut Butter Oatmeal Chocolate Chip Cookies |
Wednesday, May 18, 2011
The joy of rhubarb
Ok so I don't have any pictures of these recipes. But they are so good that they are worthy of your imagination doing the job! If you think that making jam is hard, don't worry, this jam is so easy I think that a monkey could do it and it is TASTY!
All I have to say about the RHubarb custard cake is this one word.....Heaven. Yep it is that good. So here is 2 recipes for you all! Hey 2 for the price of one!!! YAY always a good deal!!!
Rhubard (whatever flavor jello) Jam
First gather up about 4 pint jelly jars...make it 5 to be on the safe side. Find a pot that will hold enough water to cover the jars tops with about an inch of water. Put it on to boil. Meanwhile toss rhubarb and sugar in a non reactive pot and cook down until, I think that technical term is mushy, stirring often. Add jello packet and stir until disolved. Don't forget to heat up your covers in hot water. Fill up hot jars and seal them up. Process in a hot water bath for 10 minutes.
Voila you are done. You just made JAM!!!
Rhubarb custard cake
Grease a 9x13 cake pan. Pour prepared cake batter in. Sprinkle rhubarb evenly on top of batter. Sprinkle sugar evenly over rhubarb. Pour whipping cream over the top of the cake. Bake in a 350 degree oven for 50-60 minutes or until cake is nice and set. Let sit for at least 30 minutes. It takes a little while for the yummy custard to set. Beware though, this is highly addicting and will give you a belly ache if you should eat too much of its yummy goodness.....
hope you will enjoy these super easy but super good recipes!!
jennifer
All I have to say about the RHubarb custard cake is this one word.....Heaven. Yep it is that good. So here is 2 recipes for you all! Hey 2 for the price of one!!! YAY always a good deal!!!
Rhubard (whatever flavor jello) Jam
- 5 cups chopped Rhubarb
- 3 cups sugar
- 1 package Jello of your choice (I used orange it was great but strawberry would be awesome!!!)
First gather up about 4 pint jelly jars...make it 5 to be on the safe side. Find a pot that will hold enough water to cover the jars tops with about an inch of water. Put it on to boil. Meanwhile toss rhubarb and sugar in a non reactive pot and cook down until, I think that technical term is mushy, stirring often. Add jello packet and stir until disolved. Don't forget to heat up your covers in hot water. Fill up hot jars and seal them up. Process in a hot water bath for 10 minutes.
Voila you are done. You just made JAM!!!
Rhubarb custard cake
- 1 yellow cake mix prepared per cake box instructions
- 4 cups chopped rhubarb
- 1 cup sugar
- 1 pint heavy whipping cream
Grease a 9x13 cake pan. Pour prepared cake batter in. Sprinkle rhubarb evenly on top of batter. Sprinkle sugar evenly over rhubarb. Pour whipping cream over the top of the cake. Bake in a 350 degree oven for 50-60 minutes or until cake is nice and set. Let sit for at least 30 minutes. It takes a little while for the yummy custard to set. Beware though, this is highly addicting and will give you a belly ache if you should eat too much of its yummy goodness.....
hope you will enjoy these super easy but super good recipes!!
jennifer
Saturday, March 5, 2011
Twenty-Minute Chili
I received this recipe the other day in my Inbox. There was a chill in the air outside, and chili sounded great for dinner! This was pretty simple and quite delicious. I modified it a bit, including making it a meatless. Since my husband generally likes his soups/chilis pretty thin, I tripled the amount of liquid in this dishes. I have included the original ingredients in brackets or you can visit the link above for the original recipe on MyRecipes.com.

While rice cooks, heat oil in a large nonstick skillet over medium-high heat. Add onion, bell pepper, [and turkey]. Cook 3 minutes or until done. Stir in chili powder and the next 9 ingredients (chili powder through water); bring to a boil. Cover, reduce heat, and simmer 10 minutes.
Serve over rice, and sprinkle with cheese.

Yield: 4 servings (serving size: 1 1/4 cups chili, 1/2 cup rice, and 1 tablespoon cheese)
Ingredients
- 1 c long-grain white rice [originial recipe: 1 (3 1/2-ounce) bag boil-in-bag long-grain rice]
- 1 T vegetable oil
- 1/4 c dried, minced onion [originial recipe: 1 cup chopped onion]
- 3/4 c chopped green bell pepper
- 1 (15-oz) can black beans, drained and rinsed [originial recipe: 1/2 pound ground turkey breast]
- 1 T chili powder
- 1 tsp Wrcestershire sauce
- 1/2 tsp ground cumin
- 1/2 tsp dried oregano
- 1/4 tsp salt
- 1/4 tsp black pepper
- 1 (15-ounce) can kidney beans, rinsed and drained
- 1 14.5-oz can Southwestern-style diced tomatoes with green chiles, jalapeños, and lime juice, undrained [original recipe: 1 (14.5-ounce) can Mexican-style stewed tomatoes with jalapeño peppers and spices, undrained]
- 2 (5.5-oz) cans V8 [original recipe: 1 (5.5-ounce) can tomato juice]
- 1 (5.5-oz) can of water (use empty V8 can) [original recipe did not call for water]
- 1/4 cup (1-oz) preshredded reduced-fat cheddar cheese
Preparation
Cook rice according to package directions.While rice cooks, heat oil in a large nonstick skillet over medium-high heat. Add onion, bell pepper, [and turkey]. Cook 3 minutes or until done. Stir in chili powder and the next 9 ingredients (chili powder through water); bring to a boil. Cover, reduce heat, and simmer 10 minutes.
Serve over rice, and sprinkle with cheese.
Friday, February 25, 2011
Pecan-Crusted Tilapia
We're trying to incorporate more fish into our diet. It's difficult because we're not huge fans; however, we did try some tilapia when we were in Costa Rica back in January. It was prepared so deliciously that I bought some frozen fillets when we got back home. They sat in my freezer, untouched, for a few weeks, and then I received this recipe for Pecan-Crusted Tilapia in my Inbox and thought it would be a good way to start.
 Yield: 4 servings (serving size: 1 tilapia fillet)
Heat 1 1/2 teaspoons oil in a large nonstick skillet over medium-high heat. Add 2 fillets; cook 3 minutes on each side or until fish flakes easily when tested with a fork. Repeat procedure with remaining oil and fillets. Serve with lemon wedges.
Other than halving this recipe (there are only two of us), the above is unchanged from the recipe on MyRecipes.com. I served this with a side of white rice. I thought it turned out really quite delicious; Jeff thought it needed a little more breading to more significantly change the texture of the fish. I do think I'll try this recipe again.

Ingredients
- 1/2 cup dry breadcrumbs
- 2 tablespoons finely chopped pecans
- 1/2 teaspoon salt
- 1/4 teaspoon garlic powder
- 1/4 teaspoon black pepper
- 1/2 cup low-fat buttermilk
- 1/2 teaspoon hot sauce
- 3 tablespoons all-purpose flour
- 4 (6-ounce) tilapia or snapper fillets
- 1 tablespoon vegetable oil, divided
- 4 lemon wedges for garnish
Preparation
Combine first 5 ingredients in a shallow dish. Combine buttermilk and hot sauce in a medium bowl; place flour in a shallow dish. Dredge 1 fillet in flour. Dip in buttermilk mixture; dredge in breadcrumb mixture. Repeat procedure with remaining fillets, flour, buttermilk mixture, and breadcrumb mixture.Heat 1 1/2 teaspoons oil in a large nonstick skillet over medium-high heat. Add 2 fillets; cook 3 minutes on each side or until fish flakes easily when tested with a fork. Repeat procedure with remaining oil and fillets. Serve with lemon wedges.
Other than halving this recipe (there are only two of us), the above is unchanged from the recipe on MyRecipes.com. I served this with a side of white rice. I thought it turned out really quite delicious; Jeff thought it needed a little more breading to more significantly change the texture of the fish. I do think I'll try this recipe again.
Subscribe to:
Posts (Atom)
LinkWithin
