Showing posts with label Dessert. Show all posts

Sunday, August 26, 2012

Easy Pineapple-Coconut Cake

Yesterday, we were invited to dinner with some friends. I offered to bring dessert. Unfortunately, I got wrapped up in a little blog clean-up and waited until the last minute to find a recipe. Fortunately, I found this recipe over at allrecipes.com.

All ingredients on hand? Check!
Easy to put together? Check!
Relatively short baking time? Check!

PERFECT!
Easy Pineapple-Coconut Cake

Easy Pineapple-Coconut Cake

Prep time: 10 min
Cook time: 30-35 min
Yield: 1 9-inch round cake

Ingredients
  • 1 cup all-purpose flour
  • 3/4 cups sugar
  • 1 egg
  • 2 tsp baking powder
  • 1 tsp ground cinnamon
  • 1/2 (20oz)can crushed pineapple
  • 1/4 cup flaked coconut
  • 1/2 cup chopped walnuts
  • cream cheese frosting
Directions
  1. Preheat oven to 350 degrees F (175 degrees C). Grease and flour a 9-inch round cake pan.
  2. In a medium bowl, stir together the flour, sugar and baking powder. Add egg and mix until well blended. Fold in the pineapple, coconut and walnuts. Pour into the prepared pan.
  3. Bake for 30 to 35 minutes in the preheated oven, until center springs back when lightly touched or an inserted toothpick comes out clean.
  4. Spread cake with frosting, once cool.
Easy Pineapple-Coconut Cake

Wednesday, January 4, 2012

Bailey's Irish Cream Fudge

When I saw this recipe over at Two Normal Moms, I just knew I'd want to give it a try. It sounded so rich and creamy and perfect for the holidays ... or anytime. It's got a great flavor. It's a pretty soft fudge, so keep it refrigerated. Oh, and the recipe yields a LOT. I cut it in half before making it. I'd never made fudge before, so I was pleasantly surprised at how simple this was to make.
Bailey's Irish Cream Fudge
Yields: A LOT

Ingredients:
  • 2 pkgs milk chocolate chips, 12 oz each
  • 1 pkg semisweet chocolate chips, 12 oz
  • 2 jars marshmallow cream, 7 oz each
  • 2 tsp vanilla
  • 2/3 cup Bailey's Irish Cream
  • 2 cups chopped nuts, optional
  • 4 ½ cups sugar
  • 1 can evaporated mile, 12 oz
  • ½ lb butter

Directions:
1. In a very large bowl, combine chocolate chips, marshmallow cream, vanilla, irish cream, and nuts (if you're doing that option). Set aside.

2. Line a 10x15 inch pan with foil and spray lightly with cooking spray (if you don't have this size, use 9x13 plus a smaller loaf pan).

3. In a small saucepan, the sugar, evaporated milk, and butter. Bring to a boil over medium heat. Cook slowly, stirring constantly for 11 minutes.

4. Pour milk mixture over the chocolate chip mixture. Stir slowly by hand to blend (do not use a mixer). Pour into prepared pan(s). Chill until set

5. Lift fudge by foil from pans, place on cutting board and cut into squares (freezing for an hour before cutting can make your job easier, as it's a very soft fudge!)
Bailey's Irish Cream Fudge

Saturday, November 12, 2011

Pie Crust

Yet another recipe I got from over at Recipe Shoebox. That's probably my first go-to blog when I'm looking for a recipe. If she doesn't have something I'm looking for, then I'll search elsewhere.

Anyway, there was a pie I wanted to try to bake and the recipe called for a pre-baked pie shell. Since my sister is usually the pie baker, I didn't have a good pie crust recipe. I meant to pick-up one of those pre-made ones at Target, but ended up leaving the register before remembering that item.

This recipe seemed as good as any, so I figured I'd give it a shot.

It turned out pretty good; I even got some compliments on it.

Yields 2 to 3 9" pie crusts

Ingredients:
  • 1 cup shortening
  • 2 ½ cups flour
  • 1 tsp salt
  • 1 egg + cold water to make ½ cup liquid

Directions:
1. Cut the flour, salt, and shortening together until it is mostly the size of peas. Don't overwork the dough! It shouldn't start sticking together.

2. Make a slight well in the flour mixture. Add the egg mixture. Stir with a fork until just barely clinging together. Knead for 15-20 seconds, incorporating some of the loose crumbs. Again, don't overwork the dough! Knead until the dough is just holding together.

At this point, you could cover the dough and use it later, but it's best used right away.

3. Divide the dough onto a well floured pie mat or piece of wax paper. I used wax paper.  Using your hands, pat down the dough until relatively flat. You'll want to flip it over a few times during this process of flattening, reflouring the surface slightly each time.

4. Make sure that both sides of the dough and the wax paper are well floured. Using a rolling pin, roll the crust into a somewhat circular shape. Rotate the whole mat/wax paper a few times while rolling out the dough to help get a uniform thickness.

5. After rolling out to the desired thickness, brush off any excess flour. Gently pick up the entire mat/wax paper, flip it over and center it over your pie plate. Gently release the crust onto the plate and peel off the wax paper.

If making a single crust pie...

6. Trim edge of crust, so it slightly hangs over the edge of pie plate. Roll the dough up over the rim of the plate edge and flute the pie crust. I do this by gently pressing the forefinger of my left hand on one side of the crust between the forefinger and thumb of my other hand on the other side of the crust. Repeating until I've gone around the entire pie. Prick the bottom and sides of the crust with a fork.

7. Bake at 400°F for 8-10 minutes, or until the fluted edge is a very light golden brown.

NOTE: If the crust will be filled with a cream filling that will not be baked further, instead of pricking the crust with a fork prior to baking, place a sheet of wax paper over the crust and cover the bottom with pie weights or beans to help it hold its shape. Also bake it slightly longer - until the edges are a deeper golden brown.

If making a double crust pie...

6. Place pie filling into the pie crust.

7. Roll out top crust in the same manner as the bottom crust. Gently place top crust over the top of the filled pie. Trim excess dough. Pinch the top and bottom crust edges together. Roll the pinched dough up over the rim of the plate edges and flute the pie crust. I do this by gently pressing the forefinger of my left hand on one side of the crust between the forefinger and thumb of my other hand on the other side of the crust. Repeating until I've gone around the entire pie.

8. OPTIONAL. Cut out seasonal shapes with cookie cutters from the leftover dough. Place artistically on the pie. Brush lightly with milk. Sprinkle granulated sugar over the top.

9. Poke a few holes in the top crust to allow venting for the steam to escape. Bake according to the directions for the pie filling. Watch carefully and place foil over the edges or top, if it looks like it is browning too quickly.

Sunday, November 6, 2011

Halloween Cheesecakes

I know that Halloween was nearly a week ago, but, for the past few years, my parents have hosted a Halloween party the Sunday after the holiday. I was asked to make a dessert this year. I wanted to find something I could make that would use some of the squash in my fridge, so when I found this recipe over on Recipe Shoebox, I knew it would be perfect! I can't get over how great these turned out.

Halloween Cheesecakes
Flying Witch

Yields 2+ cheesecakes

Ingredients:
  • 2 ready made graham cracker crust
  • 4 8 oz packages of cream cheese, softened
  • ¾ c granulated sugar
  • ¼ c packed brown sugar
  • 2 tsp vanilla
  • 1 small golden nugget squash
  • eggs
  • ½ tsp pumpkin pie spice (or ¼ tsp cinnamon, ⅛ tsp nutmeg, ½ of ⅛ tsp each of allspice and cardamom)
  • 1/2 c semi sweet chocolate chips, melted
  • Pictures of a flying witch or a howling wolf or whatever you'd like on the cheesecake

Directions:
1. Pierce squash a few times with a fork. Soften in microwave for 45-60 secs. Cut in half; remove seeds. Place in a microwaveable dish; cover with plastic wrap. Cook for 9 minutes or until fork tender. Scoop squash into a food processor and blend until smooth. This should give you about 1 cup of purée.

2. While squash is cooking, cream the cream cheese and sugars together in a bowl until smooth and creamy. Add vanilla and eggs . Mix until well blended. Reserve 1 cup of batter. Pour remaining evenly between two graham cracker crusts.

3. Add squash purée and pumpkin pie spice to the reserved batter. Mix well. Drop by spoonfuls onto the white batter. Gently swirl with a knife. I swirled in one direction to give the impression of a windy, stormy, scary, Halloween night. I had a LOT of leftover squash batter, so I put it in a small dish to bake a 3rd, smaller, no-crust cheesecake.

4. Bake at 350°F for 40-45 min or until the center is still barely jiggly or right before cracks start to appear. Remove and let cool on cooling rack.

5. While cheesecakes are baking, place pictures under wax paper. Put melted chocolate into a plastic baggie and snip off the corner. Pipe the chocolate over the pictures. I had some extra chocolate, so I hand drew a full moon, a spider web, a spider, and some bats/birds/whatever. Place on a cookie sheet and put in the freezer to harden.

6. Once cheesecakes have cooled, cut the wax paper around the chocolate pictures and place pictures on the cheesecake, wax paper side up. Leave waxed paper on and chill cakes in the fridge for 8+ hours or overnight. Gently pull off waxed paper.

Halloween Cheesecakes
Wolf Howling at Full Moon
Halloween Cheesecakes
Spider and Web

Wednesday, October 20, 2010

Puffed-Up Chocolate-Chip Cookies

Who doesn't love a good chocolate chip cookie? Some people may prefer to stick to a tried-and-true chocolate chip cookie recipe, but I like to experiment. When I received this recipe for Puffed-Up Chocolate-Chip Cookies from MyRecipes, I couldn't wait to try it out! Plus they are made with applesauce, so they're a little lighter when talking about fat content.

These turned out super good. They were a little more cake-like than most chocolate chip cookies, which made them almost melt in your mouth.
Puffed-Up Chocolate-Chip Cookies
Ingredients
  • 1 1/4 cups all-purpose flour
  • 1 1/2 teaspoons baking powder
  • 3/4 teaspoon salt
  • 1/2 cup applesauce
  • 1 cup packed brown sugar
  • 1/4 cup butter, softened
  • 1 tablespoon vanilla extract
  • 1 large egg
  • 1 cup semisweet chocolate chips
  • Cooking spray

Directions
Preheat oven to 375°.

Lightly spoon flour into dry measuring cups; level with a knife. Combine flour, baking powder, and salt in a small bowl; stir well with a whisk.

Spoon applesauce into a fine sieve over a bowl; let stand 15 minutes. Discard liquid. Scrape drained applesauce into a large bowl. Add sugar and butter; beat with a mixer at medium speed until light and fluffy (about 2 minutes). Beat in vanilla and egg. Add flour mixture; beat at low speed until well-blended. Fold in chips.

Drop by level tablespoons 2 inches apart onto baking sheets coated with cooking spray. Bake at 375° for 10 minutes or until almost set. Cool on pan 2 to 3 minutes or until firm. Remove cookies from pan; cool on wire racks.

Monday, November 23, 2009

Spicy Surprise Chocolate Chip Cookies

I got this recipe from the back of Ziploc(R) box. It has intrigued me for more than a year. Cayenne pepper in chocolate chip cookies?? I cut out the recipe, knowing someday I'd give it a try. Well, someday finally came. These have a very unique flavor that I feel really complements the chocolate chips. I did make a couple of changes to the recipe, which I'll note in parentheses in the recipe below. You can choose which to make.
Tale of Two Sisters and Their Kitchens | Spicy Surprise Chocolate Chip Cookies
Click here for Printable Recipe

Ingredients:
  • 1 cup unsalted butter, softened (I used 1 cup shortening)
  • 1/2 cup granulated sugar
  • 1 cup firmly packed brown sugar
  • 2 large eggs
  • 2 tsps vanilla
  • 1 1/2 cups all-purpose flour
  • 1 cup whole wheat flour (I used 2 1/2 cups of flour blend which consists of 2 parts white flour, 2 parts wheat flour, 1 part wheat germ, and 1 part ground flaxseed in place of the flours in this recipe)
  • 1/2 tsp baking powder
  • 1/2 tsp baking soda
  • 1/2 tsp salt
  • 1 tsp cinnamon
  • 1/2 tsp ground ginger
  • 1/2 tsp cayenne pepper
  • 2 cups semisweet chocolate chips

Directions:
Preheat oven to 375F.
Combine butter, brown sugar, sugar, eggs, and vanilla. Beat until smooth and light.
In a separate bowl, stir together flour baking powder, baking soda, salt, cinnamon, ginger, and cayenne pepper.
Gradually mix into butter mixture. Beat just until combined and smooth.
Fold in chocolate chips until combined. Scoop cookies into 2-inch balls and place on cookie sheets.
Spicy Surprise Chocolate Chip Cookies
Bake until lightly golden, about 10 minutes.
Tale of Two Sisters and Their Kitchens | Spicy Surprise Chocolate Chip Cookies
Let cool slightly, then remove from cookie sheets and transfer to a wire rack to cool further.

I found it relatively easy to overbake these cookies. They may not look done, but if the edges are golden brown they are. They will flatten as they cool.

Tuesday, October 27, 2009

Pineapple-Cherry Dump Cake

It's usually my responsibility to provide desserts for our family dinners on Sunday evenings. Some weeks, I am really busy and don't have time to create anything elaborate. At times like this, I usually throw together something very simple, like a dump cake. I got this particular recipe from the 101 Things To Do With A Cake Mix cookbook. Even though it's super simple, I'll still give you the recipe with step-by-step photos.

Click here for Printable Recipe

Ingredients:
  • 1 box yellow cake mix
  • 1 can crushed pineapple
  • 1 can cherry pie filling
  • 1/2 to 1 stick butter (My husband LOVES butter, so I used an entire stick)

Directions:
Preheat oven to 350. Grease a 9x13 pan.
Dump 1/2 of the cake mix into pan, spreading to evenly distribute.
Dump crushed pineapple in pan, spreading to evenly distribute.
Dump cherry pie filling over pineapple, spreading to evenly distribute.


Dump the remainder of the cake mix over the top of the cherry pie filling, spreading to evenly distribute. Top with thinly sliced butter.

(I forgot to take a picture before putting in the oven, so here's a pictue with the butter slightly melted from being in the oven for a few minutes.)

Serve warm with ice or cooled with whipped topping.
Tale of Two Sisters and Their Kitchens | Pineapple-Cherry Dump Cake

Wednesday, October 21, 2009

Apple Crisp

For dessert tonight, I made an Apple Crisp. Last summer (2008) I bought a huge container of ground flaxseed at the MN State Fair. I don't know why. I'd ever used flaxseed before. I didn't really understand its purpose or function.

Before today, I'd only used a few tablespoons here and there on yogurt or in a smoothie. I've heard that you can use it to substitute flour, fat, and eggs, but making those substitutions makes me really nervous. When I bought the flaxseed, I was given a small packet of recipes they'd found online that used flaxseed. Today, more than a year later, I finally braved up and tried out a recipe.
Click here for Printable Recipe

Preparation time: 15 minutes
Baking time: 40 minutes

Ingredients:
  • 6 cups fresh sliced Braeburn Apples, or your favorite apple (I used a combination of red and green apples because that's what I had on hand)
  • 1 T fresh lemon juice
  • 2 T plus 2 tsp white sugar
  • 1 T cornstarch
  • 1 1/2 tsp ground cinnamon
  • 1/2 c ground flaxseed
  • 1/4 c brown sugar, packed
  • 1/3 c quick cooking oats (I used old fashioned)

1. Preheat oven to 350-degrees. Coat a baking dish with non-stick spray.
2. Combine apples (I peeled before slicing) and lemon juice in baking dish and toss gently to coat.
3. Combine sugar, cornstarch, and 1 tsp cinnamon. Stir with a whisk to blend.
4. Add cornstarch mixture to apple mixture and toss well to coat.
5. Combine flax, remaining cinnamon, brown sugar, and oats in separate bowl. Sprinkle evenly over apple mixture.
6. Bake for approximately 40 minutes or until apples are tender and topping is golden brown.
Apple Crisp
Again, I promise to take more, and better, pictures for future posts.

Sunday, September 10, 2006

Homemade Cream Filled Individual Sponge Cakes

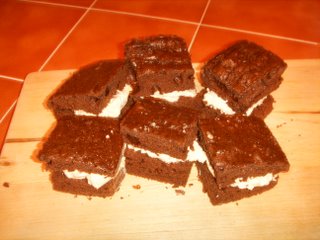
Tale of Two Sisters and Their Kitchens | Homemade Cream Filled Individual Sponge CakesWe had a ward dessert social tonight. It was potluck, so I found this recipe for homemade Twinkies (R). I changed the recipe to make them more like homemade Suzy Q's (R). I was surprised to find only one remaining when the clean-up began!

I was so excited to try out this recipe. Just ask Jeff. He said I was giddy like a school girl! I have to admit I was pretty silly. I thought the procedure of making these would be challenging, but it was surprisingly easy.

Below is the recipe...

Homemade Cream Filled Individual Sponge Cakes
Submitted by: TNthree Rated: 4 out of 5 by 9 members
Prep Time: 45 Minutes Cook Time: 30 Minutes
Ready In: 1 Hour 15 Minutes Yields: 24 servings
"Yellow cake bars are frosted with a shortening and evaporated milk filling in this homage to the famous snack cakes."

INGREDIENTS:
  • 1 (18.25 ounce) package
  • yellow cake mix
  • 1/2 cup butter
  • 1/2 cup shortening
  • 1 cup white sugar
  • 1 (5 ounce) can evaporated
  • milk
  • 1 tablespoon vanilla extract

DIRECTIONS:
1. Bake cake according to package directions in a 9x13 inch pan. Cool and cut into bars. Cut each bar in half lengthwise to make two layers.
2. In a large bowl, beat butter with an electric mixer until creamy. Beat in shortening, a little at a time, until fluffy. Gradually beat in sugar. Combine evaporated milk and vanilla and beat into filling, scraping the bowl, until fluffy.
3. Sandwich the bars with the fluffy filling.

ALL RIGHTS RESERVED © 2005 Allrecipes.com
Printed from Allrecipes.com 9/10/2006

Monday, July 10, 2006

Chocolate cake...Yummy!!

Tale of Two Sisters and Their Kitchens | Chocolate Cake

If you know me, you know I love to cook/bake for gatherings. Jeff and I had dinner with some friends the other night, and I offered to make dessert.
I wanted something cool and summery and found this recipe on All Recipes. It turned out delicious.
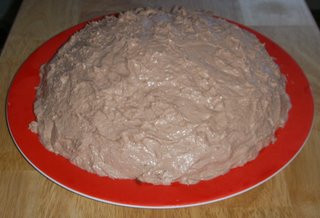
The recipe is below. It yields a 9x13 cake, but I didn't need one that large. I divided the cake batter into a round cake, and 12 cupcakes. Also, I used strawberry gelatin. I needed to modify the frosting a bit because my grocery store didn't have the whipped topping mix. Instead, I used frozen whipped topping i.e. Cool Whip (R). I mixed it with the chocolate pudding and added some milk to help with the consistency.

Chocolate Cake IV
Submitted by: REB Rated: 4 out of 5 by 2 members
Prep Time: 20 Minutes Cook Time: 35 Minutes
Ready In: 55 Minutes Yields: 12 servings
"Use any flavor of gelatin to compliment this refreshing chocolate version of the poke cake. Serve it straight from the freezer."

INGREDIENTS:
  • 1 (18.25 ounce) package
  • chocolate cake mix
  • 1 (3 ounce) package fruit
  • flavored gelatin mix
  • 1 cup boiling water
  • 1/2 cup cold water
  • 2 (3.9 ounce) packages instant
  • chocolate pudding mix
  • 2 (1.3 ounce) envelopes
  • whipped topping mix
  • 3 cups cold milk

DIRECTIONS:
1. Prepare and bake cake mix according to package directions for a 9x13 inch pan. Poke holes in cake while still hot with a fork. Make gelatin with 1 cup of boiling water, then stir in cold water. Slowly pour liquid gelatin over hot cake. Cool cake completely in the freezer before frosting.
2. To make the frosting: Using an electric mixer, beat together the instant pudding, whipped topping and milk until thickened. Pour over completely cooled cake. Keep cake in freezer until ready to serve.

ALL RIGHTS RESERVED © 2005 Allrecipes.com
Printed from Allrecipes.com 7/10/2006

LinkWithin

Related Posts with Thumbnails